Are you nervous about a painful tattoo, waxing, or laser session? Numbing cream can help you stay calm and comfortable. It blocks the pain in your skin so that you can focus on the experience instead of the discomfort.
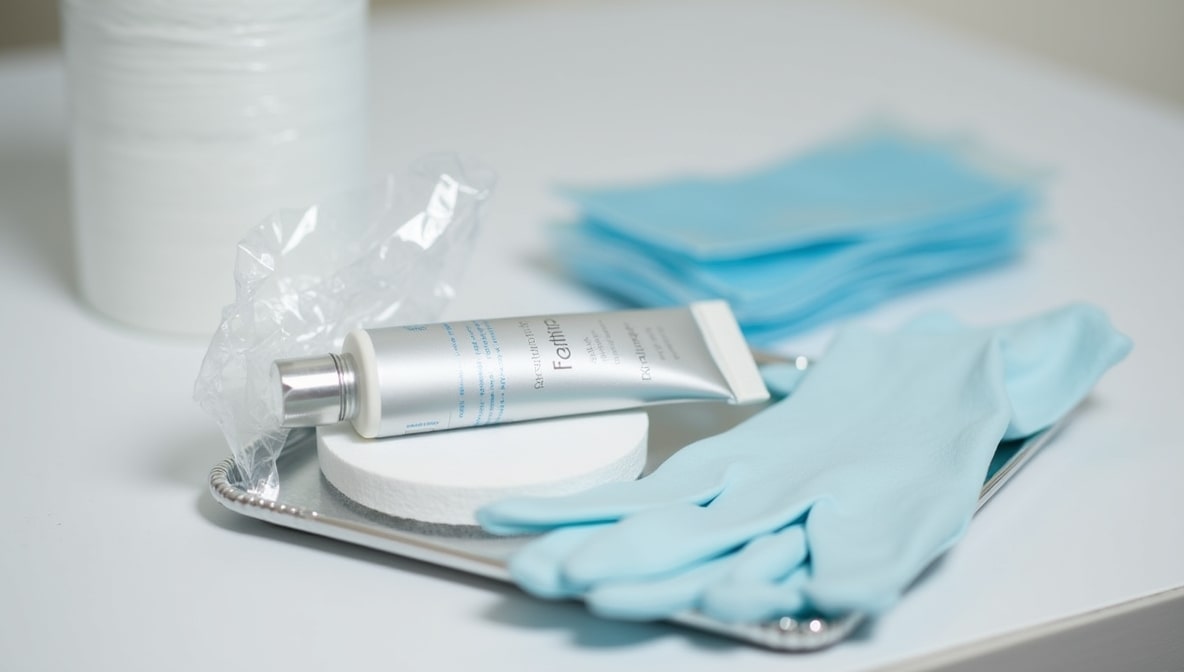
Numbing cream helps reduce pain during minor procedures by blocking pain signals when applied to clean skin. Follow the label instructions by applying a thin layer, waiting for a few minutes to let it work, and then washing it off after the treatment. Always perform a patch test first and consult a professional if you have any concerns or experience side effects.
Here’s a step-by-step guide on how to use numbing cream the right way.
How To Use Numbing Cream: Eguide On Application Timing, Safety Advice, Covering Sensitive Areas, Children, And Daily Use
If you’re ever facing a little procedure like waxing or tattooing that might come with a hint of pain, you're in the right place. We’re here to break down everything you need to know in simple, clear steps, so you can feel at ease and be confident about using numbing cream safely. Think of this guide as a friendly chat where you get all the tips and tricks without any fuss.
What Is Numbing Cream?
Numbing cream is a topical anesthetic. That means it’s a cream you apply to your skin to make it feel numb.
Why do people use numbing cream
- It blocks pain signals from the nerves in your skin. Once the cream takes effect, your nerves don’t send as many pain messages to your brain. That means you don’t feel as much.
- It’s commonly used before painful skin procedures: Many people use it before tattoos, laser hair removal, microneedling, waxing, or even injections.
- It provides temporary relief: The numbing effect usually lasts between 1 to 3 hours, that depends on the type and brand of cream used.
When Should You Use It?
Numbing cream isn’t just for tattoos. It can help with many kinds of skin discomfort. Situations where numbing cream can help:
- Tattoo or permanent makeup sessions: Tattooing involves many tiny needle pricks, which can be painful. Numbing cream helps reduce that pain so you can sit longer without squirming.
- Laser treatments or microneedling: Laser skin treatments or microneedling can feel like tiny rubber bands snapping on your skin. Cream makes the treatment more bearable.
- Waxing or hair removal: Whether it’s waxing, epilating, or electrolysis, removing hair from the root hurts! A numbing cream takes the edge off.
- Minor medical or cosmetic procedures: Shots, blood draws, mole removals, or even vaccinations may cause discomfort, especially for kids or sensitive adults.
Always check with your doctor or provider if you're not sure whether numbing cream is safe for your situation.
Steps to Apply Numbing Cream
Now that you know what numbing cream is and when to use it, let’s look at how to apply it. This guide will give you clear, step-by-step instructions so you can use the cream safely and effectively.
Step 1: Clean the Area First
Before applying numbing cream, you need to prep your skin properly. This helps the cream work better and lowers your risk of irritation. How to clean the skin:
- Use mild soap with warm water: Wash the area gently to remove any sweat, dirt, or oils. These can block the cream from soaking in.
- Pat the area dry with clean towel: Don’t rub it hard, just dry it softly so your skin stays smooth.
- Avoid using lotion or oil before the cream: Moisturizers or oily products can create a barrier that stops the cream from working well.
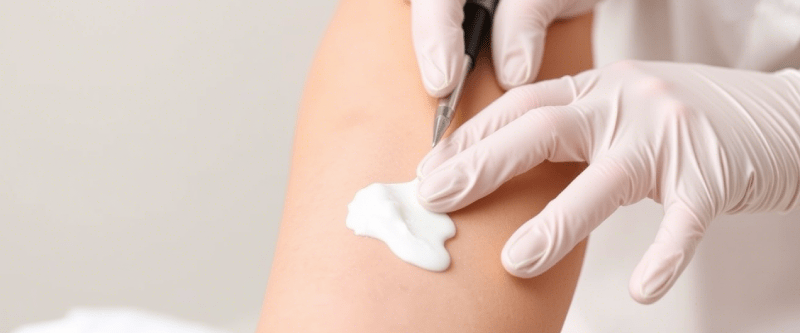
Step 2: Apply a Thick Layer
Now that your skin is clean, also dry. It’s time to apply the numbing cream. How you apply it makes a big difference in how well it works. Tips for applying the cream:
- Use gloves or clean hands: If you’re applying it with your fingers, wash your hands first or wear gloves. You don’t want to numb your fingertips by accident.
- Apply a thick, visible layer over the area: You don’t need to rub it in like lotion. In fact, leaving a visible layer sitting on top of the skin helps it absorb better over time.
- Cover the whole area that will be treated: Don’t miss spots! If only part of the area is numbed, the untreated skin may still feel pain.
Make sure to follow the instructions on the package for how much to use.
Step 3: Cover It With Plastic Wrap
After applying the cream, you’ll want to lock in the moisture and heat. That’s where plastic wrap comes in handy. Why plastic wrap helps:
- It keeps the cream from drying out: If the cream dries, it can stop working. Covering it with plastic wrap in the moisture and boosts absorption.
- It helps the cream soak into the skin: The heat from your body under the wrap opens your pores slightly, helping the cream sink in faster and more deeply.
- It prevents mess: Plastic wrap keeps the cream from rubbing off onto clothes or furniture while you wait.
Just cut a small piece of kitchen plastic wrap and gently place it over the cream. Don’t wrap it too tightly, just enough to cover the area.
Step 4: Wait 30 to 60 Minutes
Now it’s time to let the cream do its job. This step takes a little patience, but it’s worth it. How long should you wait?
- Most numbing creams work best after 30–60 minutes: You’ll start to feel a slight tingling, then numbness as time goes on.
- Set a timer so you don’t forget: Leaving it on too long can cause skin irritation or other side effects.
- Don’t touch or move the wrap: Try to stay still so the cream stays in place and absorbs evenly.
Some creams may have a different wait time, so always read the label to be sure.
Step 5: Remove the Cream
Once the wait time is over, it’s time to clean up and get ready for the treatment. How to safely remove the cream:
- Take off the plastic wrap carefully: Try not to smear the cream around too much as you remove it.
- Wipe off the cream with a cloth or clean tissue: Be gentle. Use a soft cloth or paper towel to wipe away the remaining cream.
- Wash the area with cool water: This helps remove any leftover cream and reduces the chance of irritation during your treatment.
After this step, your skin should feel numb, like it's "asleep." You’re now ready for your tattoo, laser, or waxing session.
Tips to Remember

To stay safe and get the best results, here are a few things to keep in mind. Important safety tips:
- Do a patch test first: Try a small amount on a small spot of your skin a day before you use it fully. This helps you see if you’re allergic to the cream.
- Don’t use more than the directions say: Using too much numbing cream can cause side effects like skin irritation, headaches, or a fast heartbeat.
- Avoid using on broken or irritated skin: Numbing cream is meant for healthy skin. Don’t apply it to cuts, sunburns, or rashes.
- Keep it away from your eyes, mouth, and open wounds: These areas are more sensitive and can absorb the cream too quickly.
Conclusion:
And there you have it, a friendly walkthrough to help you use numbing cream safely and effectively. By keeping your skin clean, following the label instructions, and taking a few extra precautions, you can ease minor discomforts without any worries. Remember, it’s all about taking care of yourself with simple steps.
If you found this guide helpful, stick around for more tips on handling everyday challenges with ease. Stay safe, and here’s to a smoother, pain-free experience next time you need a little help. Enjoy taking care of yourself!