![9 Best Methods of Adjusting Cycling Bikes [Safe and Easy]](https://cacyclinghub.com/wp-content/uploads/2025/07/9-Best-Methods-of-Adjusting-Cycling-Bikes-Safe-and-Easy.jpg)
Riding a cycling bike that isn’t correctly adjusted can lead to various issues. These include discomfort, Knee Pain, inefficient pedaling, and potential injuries. Poor handlebar reach or saddle tilt can cause back discomfort. Incorrect handlebar height may lead to hand numbness. Misaligned pedals and saddles or inefficiently transferred power affect power production.
Adjust your cycling bike by adjusting your saddle height and fore/aft position. The bottom of your pedal stroke should be almost straight. Check the handlebar height and reach. Aim for a natural wrist angle and comfortable reach to the handlebars. Fine-tune your gear shifting and brake lever positions for easy access while riding.
In this blog post, I will discuss some methods of adjusting your cycling bike that could transform your cycling sessions into a ride of joy.
Key Takeaways
- Adapting your bike to fit your specific body shape and size is essential for a comfortable, efficient, and safe cycling experience.
- Saddle height and position adjustments are essential, and they can be fine-tuned while riding to ensure maximum power transfer and minimize knee strain.
- The handlebar's height and fore/aft position impact upper body comfort and control.
- Adjusting resistance settings can simulate various terrains and intensities, enhancing overall cycling conditioning.
- An efficient pedaling technique and correct shoe cleat alignment can improve performance and reduce fatigue.
- Maintaining a stable and aerodynamic body posture, including core engagement and a relaxed grip on the handlebars, can enhance efficiency and reduce fatigue.
How To Adjust Cycling Bike: 9 Best Methods
To fully enjoy your cycling experience, adjusting your bike to fit your body correctly is crucial. Each change from saddle height to handlebar position is vital in ensuring comfort, efficiency, and safety during your rides. Here are some of the essential steps to adjust your cycling bike for optimal performance and comfort:
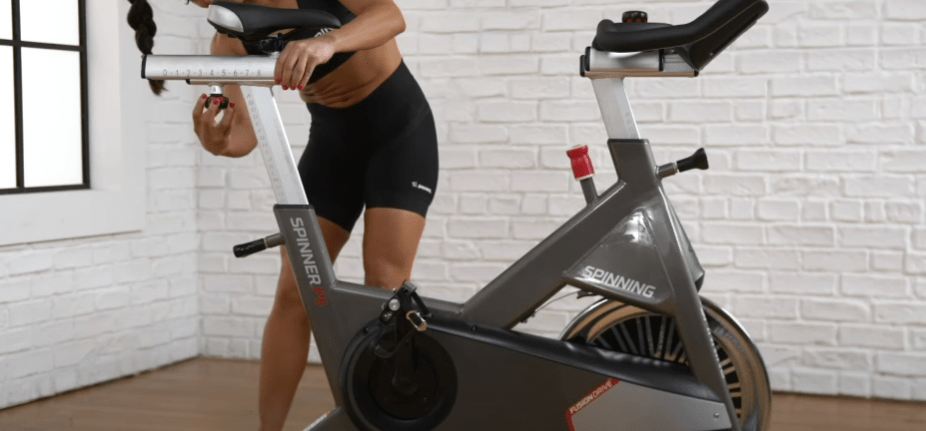
Saddle Height Position
Ensuring the correct saddle height on your cycling bike is crucial for comfort, efficiency, and injury prevention. Here's a concise guide to choosing the optimal saddle height:
- Begin with a Rough Estimate: Stand next to your bike and adjust the saddle height to align with your hip bone. This initial change provides a starting point for further fine-tuning.
- Fine-Tune While Riding: Mount the bike and start pedaling. Your leg should be nearly straight when you pedal down. This alignment promotes maximum power transfer and minimizes strain on your knees.
- Check Knee Angle: While pedaling, observe your knee angle at the bottom of the stroke. Ideally, your knee joint should be slightly bent, approximately 25-35 degrees. Adjust the saddle height as needed to achieve this optimal angle.
Saddle Fore/Aft Position
Fine-tuning your saddle's fore/aft position is essential for optimizing power transfer and comfort during your cycling sessions. Here's a brief guide to help you achieve the ideal saddle fore/aft adjustment:
- Neutral Position: Begin by sitting on the saddle with your pedals parallel to the ground. Ensure that your kneecap aligns with the pedal spindle when your foot is at 3 o'clock. This neutral starting point sets the foundation for further adjustments.
- Fine-Tuning: Make incremental adjustments forward or backward to refine your saddle fore/aft position. Experiment with these minor changes to discover the position that offers the most comfort and efficiency for your riding style.
Handlebar Height and Fore/Aft Position
The correct handlebar height and fore/aft positioning on your cycling bike is key to enhancing upper body comfort, control, and overall riding experience. Here's a concise guide to help you optimize your handlebar setup:
- Height Adjustment: Adjust the handlebar height to ease neck and shoulder strain. Aim for a position that allows a natural wrist angle, promoting a comfortable posture during rides.
- Handlebar Fore/Aft Positioning: Ensure the handlebar is positioned neither too far nor too close to your body. When gripping the bars, your elbows should maintain a slight bend, showing a relaxed and efficient riding position.
Resistance Control
If your bike features resistance settings, particularly common in indoor stationary bikes, consider the following recommendations:
- Warm-Up: Start your ride with low resistance to gently warm up your muscles and prepare them for more intense efforts.
- Gradual Increase: Throughout your ride, incrementally increase resistance levels to mimic various terrains or intensities, challenging yourself and enhancing your overall conditioning.
Pedal Stroke Technique
Efficient pedaling technique helps to improve your cycling performance and reduce fatigue. Follow these tips to optimize your pedal stroke:
- Smooth Circles: Strive to complete full pedal strokes by pushing down and pulling up evenly, engaging all muscle groups for a more efficient ride.
- Avoid Mashing: Do not solely rely on downward force during pedaling. Instead, use your hamstrings to pull upwards, maintaining a balanced effort throughout the pedal rotation.
Adjusting Shoe Cleats
For cyclists using clip-in pedals, correct shoe cleat alignment is crucial for optimal power transfer and comfort:
- Centered Position: Align your cleats so that the ball of your foot aligns directly over the pedal spindle, promoting a balanced and efficient pedal stroke.
- Toe Angle: Adjust the cleat angle to match your natural foot position, ensuring a comfortable and biomechanically sound connection between your foot and the pedal.
Body Positioning
Stabilizing and aerodynamically positioning your body while cycling enhances efficiency and reduces fatigue. Consider the following suggestions for improved body positioning:
- Core Engagement: Increase your core muscles to stabilize your upper body and maintain a strong and controlled riding position.
- Relax Your Grip: Avoid gripping the handlebars too tightly; instead, allow your arms to absorb road vibrations, promoting a more relaxed and comfortable ride.
Ensuring Safety and Security
Before embarking on any cycling adventure, prioritize safety by conducting essential checks:
- Helmet Fit: Confirm that your helmet fits securely, covering your forehead and providing adequate protection in case of impact.
- Tighten Bolts: Double-check all bolts on your bike, including those securing the saddle, handlebars, and pedals, to ensure they are tightened securely.
- Brake Test: Test your brakes to verify their responsiveness and functionality, crucial for safe stopping during your ride.
Pre-Ride Essentials
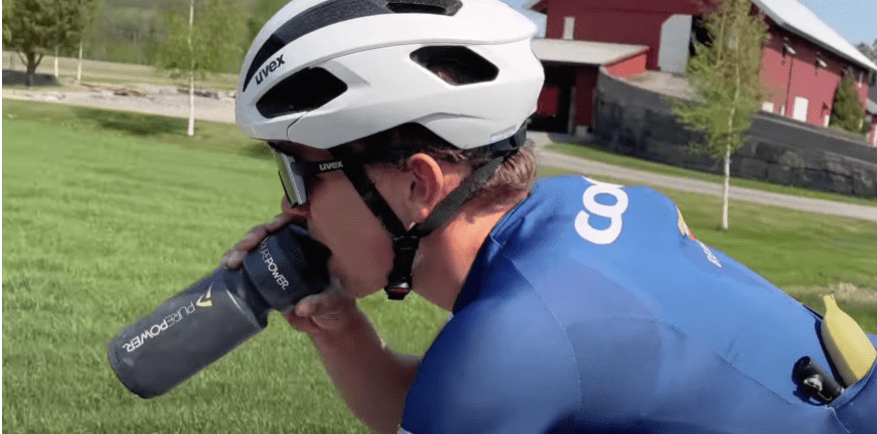
Prepare yourself for a successful ride by considering these final checks:
- Clothing: Opt for moisture-wicking clothing and padded cycling shorts to enhance comfort and minimize chafing during longer rides.
- Hydration: Fill your water bottle and maintain proper hydration throughout your ride, especially in warmer weather or during extended cycling sessions.
Conclusion
Adjusting your cycling bike according to the comprehensive guide provided can significantly enhance your riding experience, performance, and overall enjoyment of cycling. Take the time to fine-tune your bike setup to match your body proportions and preferences, and you'll be ready for a smooth and comfortable ride every time. Enjoy fully cycling with a properly adjusted bike tailored to your needs!