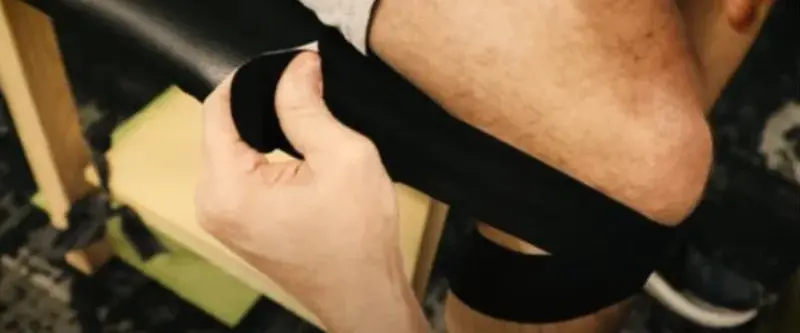
The tape should be gently stretched to 30-50% tension before cycling to tap an arthritic knee. Wrap it carefully around the knee, securing the ends securely.
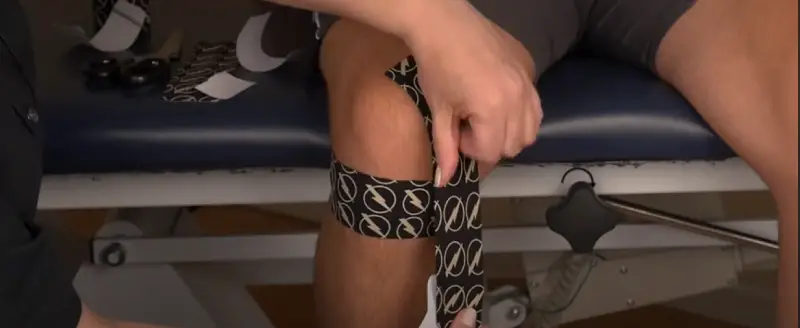
You can tape up an arthritic knee before cycling by cutting adhesive gauze into 2 pieces and placing them over the kneecap. Tape a strip from the middle of the kneecap to the inner knee. If you want more support, wrap a 10-inch strip of tape around the inner knee area at 90 degrees.
We will provide a step-by-step guide for taping an arthritic knee before cycling, including pre-taping considerations and 3 taping techniques.
How To Tape An Arthritic Knee Before Cycling: 5 Steps
You should ensure your knees are adequately supported to prevent pain and further injury. Taping your arthritic knee can provide the necessary support, allowing you to enjoy your ride. Here’s a simple guide on how to do it.
Materials Needed for Taping
Before you start, make sure you’ve got everything you need. For taping an arthritic knee for cycling, you’ll need:
- Tape: Stretchy tape provides support without restricting movement.
- Scissors: These are used to cut the tape to the correct length.
- Skin preparation wipes: To clean the skin before applying the tape.
Measuring and Cutting the Tape
First things first, let’s prep the tape:
- Measure: Sit with your knee bent at a 90-degree angle. Measure the tape from the bottom of your thigh to the top of your calf.
- Cut: Using the scissors, cut the tape according to your measurements. You’ll need two strips of this length.
- Round the Edges: Trim the corners of the tape to rounded edges. This helps prevent the tape from peeling off easily.
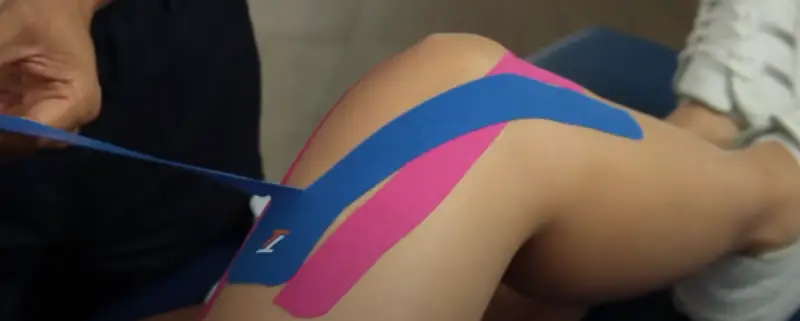
Application Process with Illustrations
Now, let’s get taping:
- Clean Your Skin: Use the skin preparation wipes to wash the area around your knee. This ensures the tape sticks well.
- Apply the First Strip:
- Start below the knee, on the inner side.
- Stretch the tape as you apply it over your kneecap, finishing on the outer side of your thigh.
- Ensure there’s no wrinkling.
- Apply the Second Strip:
- This time, start on the outer side below the knee.
- Stretch the tape, crossing over the first strip, and finish on the inner side of your thigh.
- Rub the Tape: Gently rub the tape to activate the adhesive. This helps it stick better.
Tips for Securing the Tape
To make sure your tape stays put while you’re cycling with an arthritic knee:
- Wear it Dry: Apply the tape to dry skin and set it for about 30 minutes before sweating or getting it wet.
- Smooth Edges: Always smooth down the edges firmly.
- Be Gentle: When removing the tape, do it gently to avoid irritating your skin.
Aftercare and Maintenance
When your knee is taped up and ready to hit the road (or trail) on your bike, you must know how to look after that tape job. Good aftercare means your knee gets the support it needs without any extra problems.
When to Remove The Tape
First off, let’s talk about how long that tape should stay on:
- Just the Right Time: Keep the tape on for 3 to 5 days. This will give your knee the support it needs while you’re cycling.
- Check After Cycling: If you cycle a lot, check the tape after your ride to make sure it’s still doing its job.
- Listen to Your Skin: If the tape makes your skin upset (itchy or sore), it’s time to remove it.
Signs to Watch for Indicating the Need to Remove the Tape
Your skin will tell you when to say goodbye to the tape. Here’s what to watch for:
- Itchy or Bothered Skin: If your skin dislikes the tape, it’s best to remove it.
- Tape Coming Loose: If the edges of the tape start to peel off, it won’t help your knee much.
- Wet Tape: Got the tape wet, and it won’t dry? You should take it off to avoid any skin trouble.
Re-taping Frequency
Keeping that tape fresh is critical to helping your knee feel good while you cycle:
- Take a Breather: Give your skin about 24 hours to chill out before putting new tape on.
- Skin Check: Always look at your skin before you put on more tape. You don’t want to cover up any skin reactions.
- Ask the Pros: How often should you re-tape? A professional can give you the best advice.
Pre-Taping Considerations for Arthritis Knees When Cycling
It’s wise to prepare before wrapping your knee with tape. This preparation helps ensure that the taping will support your knee correctly while cycling and will not lead to any extra problems.
Consulting with a Healthcare Professional
It’s always wise to talk to an expert before trying something new, especially concerning your health.
- Why it’s important: A doctor or physical therapist can look at your situation and tell you if taping your arthritic knee for cycling is a good idea.
- Finding the best method: They can suggest the most effective way to tape your knee and the best kind of tape to use.
- Avoiding further injury: This step is crucial to ensure you don’t accidentally hurt your knee more by taping it wrong.
Skin Preparation
Getting your skin ready is a crucial step before putting on the tape.
- Clean and dry: Ensure your knee is free from oils, lotions, or sweat. This helps the tape stick better.
- Dealing with hair: If your knee is hairy, you should trim it. Too much hair can stop the tape from sticking well.
- Protecting your skin: Use a pre-taping spray or a barrier cream if your skin is sensitive to prevent irritation from the tape.
Contraindications and Precautions
Sometimes, it might not be a good idea to tape your knee. Let’s look at these situations.
- Skin issues: Don’t tape over any skin infections, cuts, or severe psoriasis around your knee.
- Blood flow problems: If you have poor leg circulation, ask a doctor before using tape, as it could worsen things.
- Allergies: Make sure you’re not allergic to the tape’s material. If unsure, test a small piece on another body part first.
3 Taping Techniques for An Arthritic Knee Before Cycling
Choosing the correct taping technique is crucial for enhancing your cycling experience, especially when dealing with an arthritic knee. These methods aim to stabilize your knee, alleviate pain, and cater to your needs.
Technique for Stability and Support
A stable knee means a smoother ride. Let’s see how to tape for better support.
- Focus on support: This technique uses tape to mimic your knee’s natural support system, adding extra stability.
- Strategic placement: Tape supports the knee’s movements while cycling, ensuring it doesn’t bend in discomfort.
- Breathability: The tape allows your skin to breathe, keeping the knee comfortable throughout your ride.
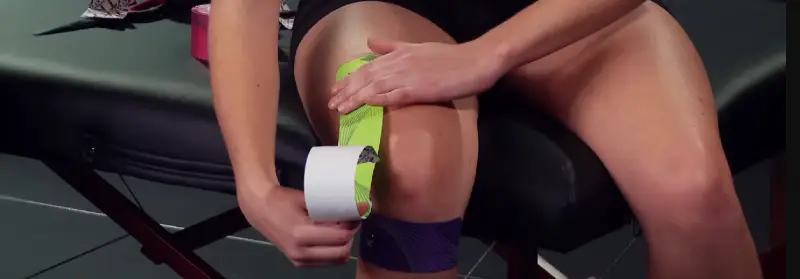
Technique for Pain Relief
Don’t let pain ruin your cycling adventure. Here’s a technique focused on comfort.
- Targeting pain areas: This method places tape over specific regions around the knee known to cause pain, helping to relieve it.
- Gentle compression: The tape gently compresses the knee, reducing swelling and pain while cycling.
- Flexibility: It’s applied in a way that allows a full range of motion so you can pedal without feeling restricted.
Customized Taping Methods Based on Needs
Because everyone’s knee is different, sometimes a personalized approach is best.
- Personal assessment: Start by assessing how your arthritic knee feels during and after cycling to identify specific needs.
- Adaptable techniques: Combine elements from both stability and pain relief methods, adjusting based on what provides the most comfort and support.
- Regular adjustments: As you continue cycling, pay attention to how your knee responds and adjust the taping method to find the best fit.
Conclusion
You now have a complete taping guide before you hit the road. Remember, while tape can be a fantastic ally in your fight against knee pain, it’s just one part of a larger strategy. Consider pairing your taping routine with other pain management techniques for the best results.
Always listen to your body and consult a physician to tailor the approach to your needs. With your knee securely supported, it’s time to get back out there and enjoy the ride. Keep spinning, and stay pain-free.
FAQs
Can Knee Taping Prevent Injuries?
Yes, knee taping effectively prevents and manages knee injuries. Tape is crucial in early injury management and rehabilitation when applied correctly, reducing the likelihood of injury recurrence during training.